LaserGRBL is one of the most popular free software solutions for controlling diode and some CO₂ laser engravers. It’s lightweight, easy to use, and works well for image engraving, vector cutting, and basic G-code control.
In this guide, we’ll go step-by-step through the most important LaserGRBL settings to achieve clean, accurate, and high-quality engravings.
1. Install and Connect Your Laser
- Download LaserGRBL from the official site (https://lasergrbl.com).
- Install and launch the program.
- Connect your laser engraver via USB.
- In the top-left corner, select the correct COM Port and Baud Rate (most common is 115200).
- Click Connect — the console should display a welcome message from your laser’s firmware (GRBL).
2. Basic GRBL Configuration
Before engraving, ensure your GRBL firmware is set up correctly:
- Go to Grbl → Grbl Configuration.
- Key parameters to check:
$30= Max S-value (commonly 1000 or 255; must match LaserGRBL settings)$32=1— enables Laser Mode (prevents spindle acceleration delays).- Steps per mm for X/Y axes (
$100/$101) should be calibrated to ensure correct scaling.
3. Image Preparation
- Use high-contrast images — convert to black and white if possible.
- In LaserGRBL, click File → Open File and select your image (JPG, PNG, BMP).
- Choose an engraving mode:
- Dithering — for shaded images with dots pattern.
- Grayscale — for power modulation based on pixel brightness.
- Vectorize — for outlines only.
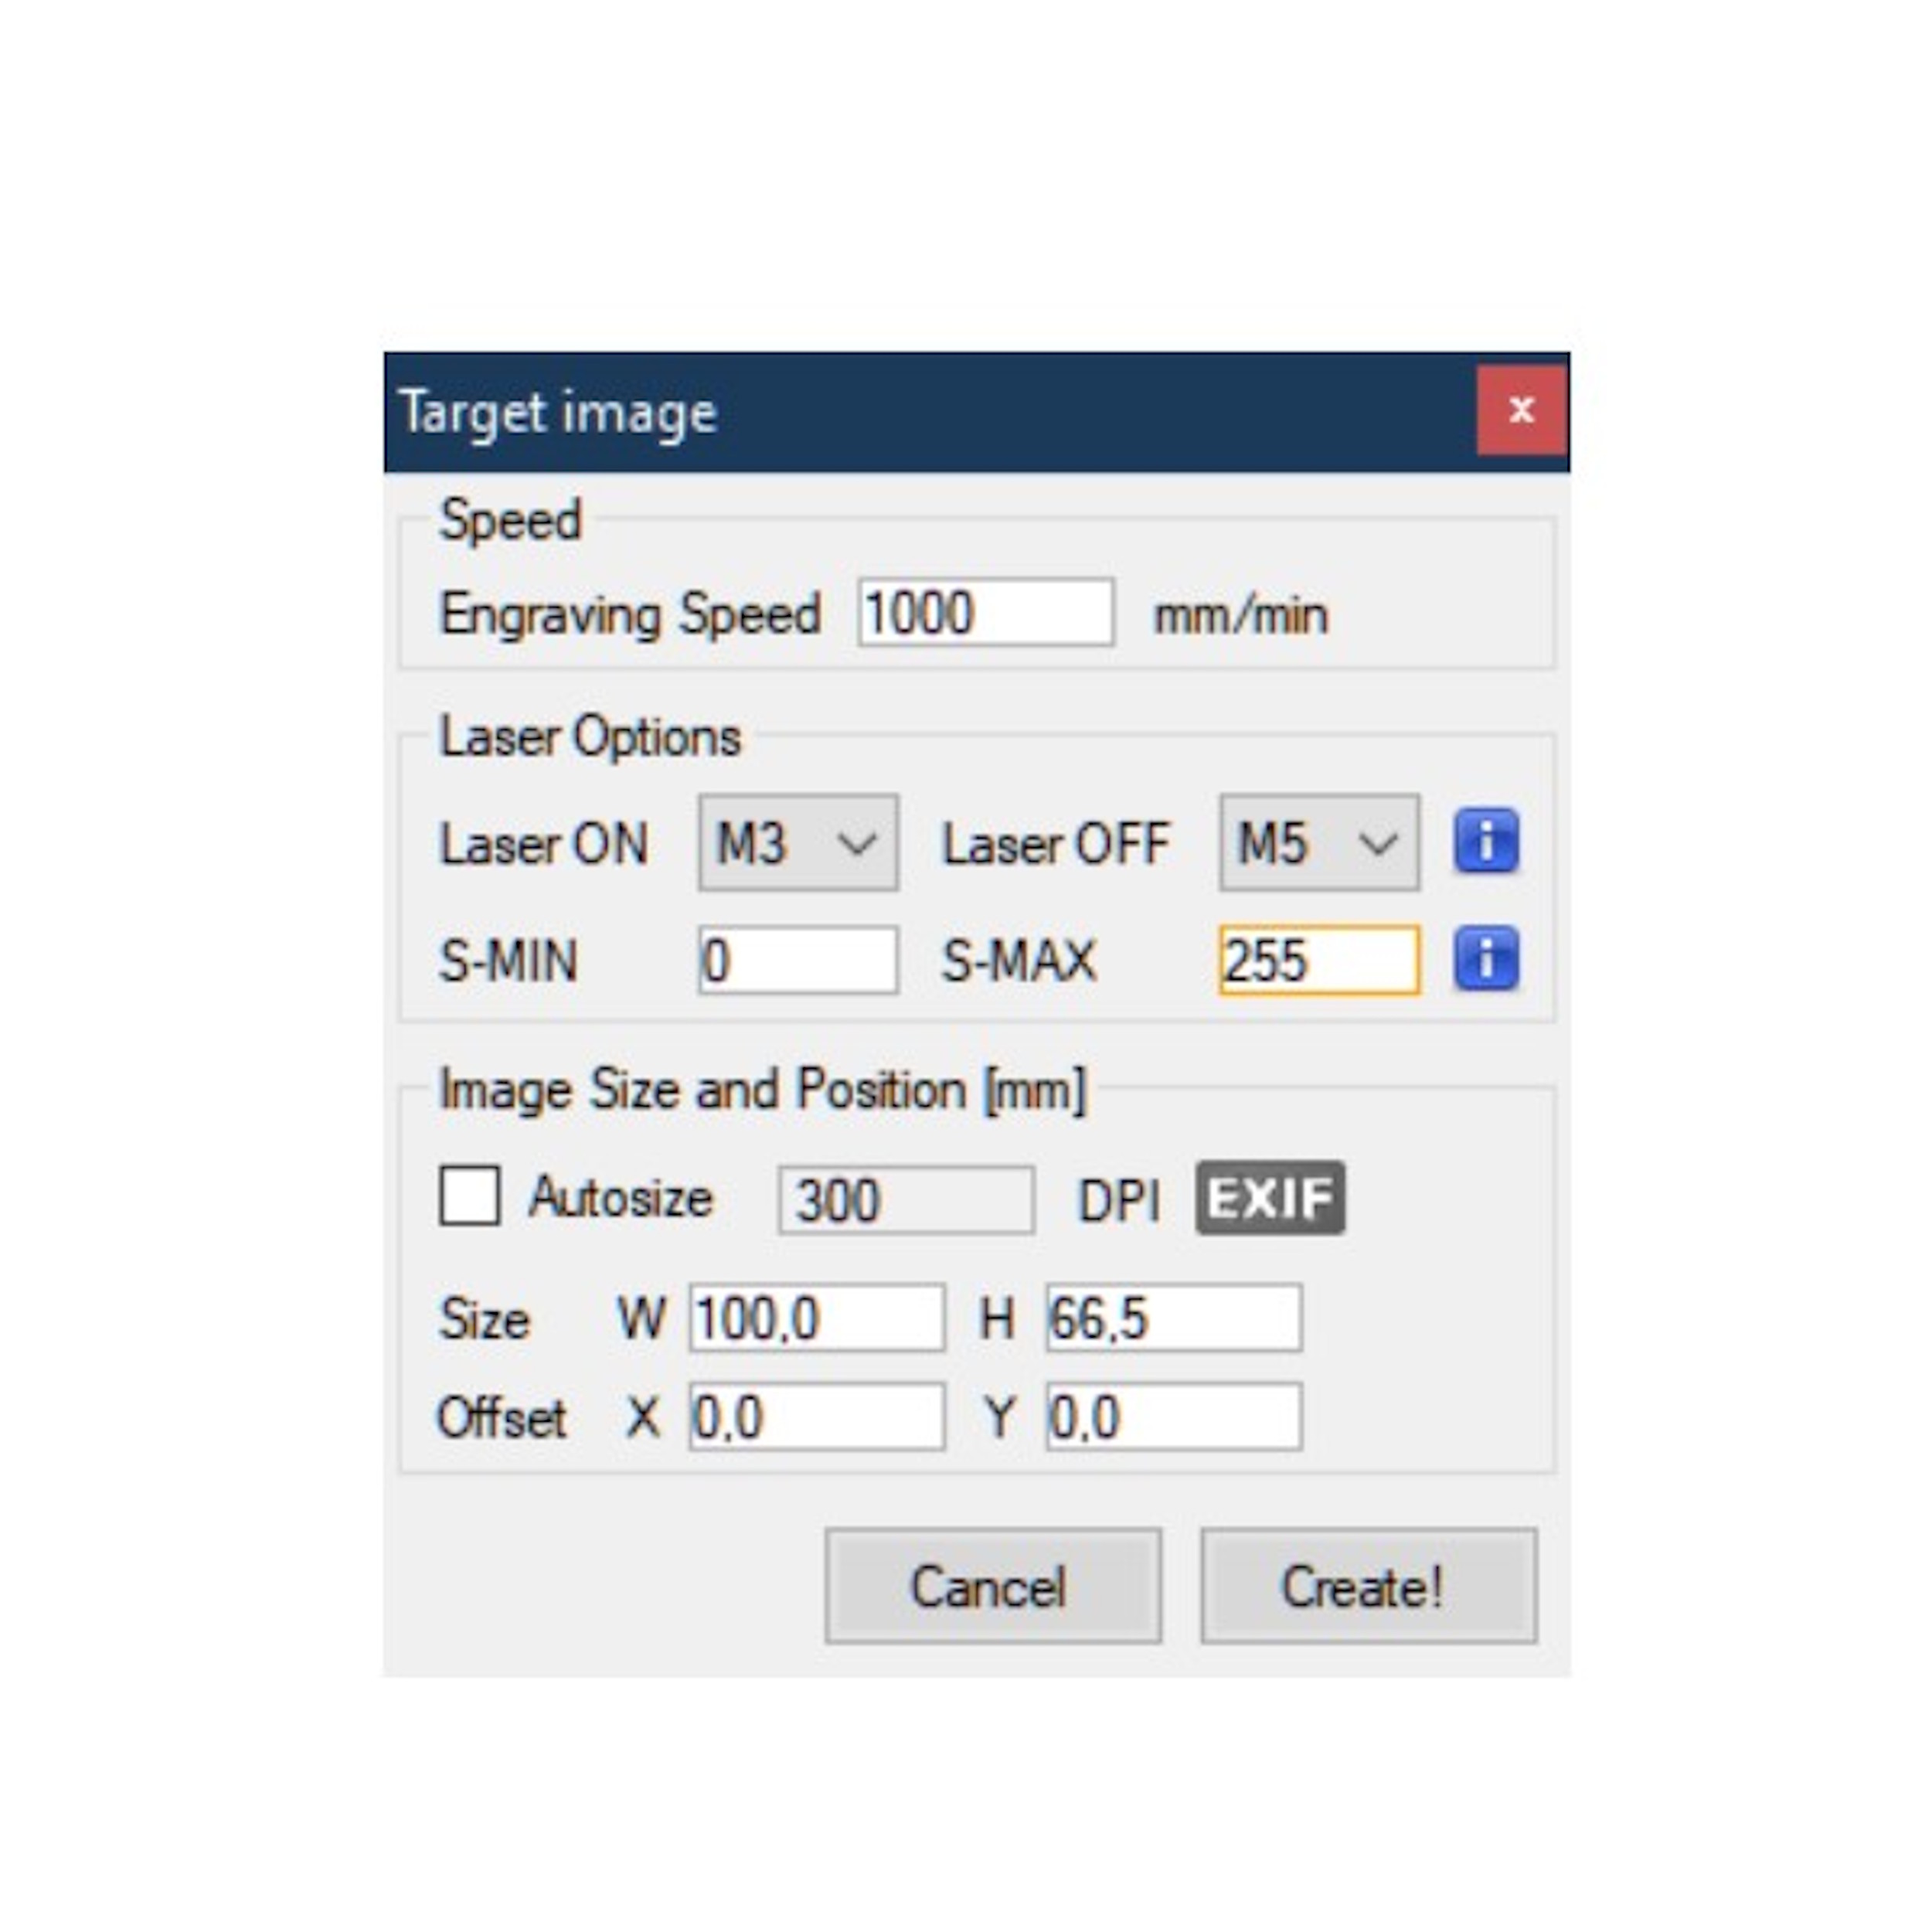
4. LaserGRBL Engraving Settings
When importing the image, key parameters are:
| Setting | Recommended Value | Notes |
|---|---|---|
| S-value max | Same as $30 in GRBL | Prevents over/under power |
| Laser Power (%) | 30–80% | Start lower for light materials |
| Feed Rate (mm/min) | 1000–3000 | Lower = more burning, higher = lighter mark |
| Line Interval (mm) | 0.1–0.15 | Smaller = higher detail but slower |
| Passes | 1–3 | Multiple passes for deeper engraving |
5. Material-Specific Recommendations
| Material | Power | Feed Rate | Line Interval |
|---|---|---|---|
| Plywood (3mm) | 50–70% | 1500 | 0.12 |
| Hardwood | 60–80% | 1200 | 0.1 |
| Leather | 20–40% | 2500 | 0.15 |
| Acrylic (cast) | 40–60% | 1800 | 0.12 |
| Cardboard | 20–40% | 2500 | 0.15 |
6. Focusing and Safety
- Adjust the focus so the laser spot is as small as possible.
- For diode lasers, move the Z-axis or focus ring until the spot is sharp.
- Always wear laser safety glasses appropriate for your laser’s wavelength.
- Use proper ventilation — engraving produces smoke and fumes.
7. Test and Fine-Tune
- Always run a test pattern (e.g., a grayscale test or power/speed grid) on scrap material.
- Adjust power and feed rate until you achieve the desired burn depth and detail.
- Save your tested settings for each material to speed up future jobs.
Conclusion
Perfect engraving in LaserGRBL comes down to balancing power, speed, line interval, and focus. With the right preparation and test runs, you can achieve professional results even with entry-level laser machines.